You’ve been eating it wrong! I said to myself. This was my a-ha moment regarding “Umeboshi” or Japanese pickled plums.
Umeboshi are a universal staple in Japan. These tiny preserved plums can be kept for years and are soft in texture yet very sour, salty yet with hints of sweetness. Its an unusual taste if you’re not prepared for it and my first time trying it years ago, I took a big a bite like I was eating, well, a regular plum. An overpowering sour taste filled my mouth. Needless to say, I wasn’t a fan. From that point on,I thought umeboshi were just another strange Japanese food to put on my “do not eat” list. Little did I know then, I would come to love these sour little plums.
My change of heart happened last fall at the Hakkaisan company cafeteria. One day, I looked over and saw my colleague use his chopsticks to nip of a small piece of the pickled plum and eat that tiny salty bit on top of a bite of white rice. I tried the same and it was a revelation. Eaten in small bites together with rice, Umeboshi is absolutely delicious. I asked about the plums and was told to my surprise that they were homemade! These Umeboshi we enjoy at the cafeteria are made every year by Mr. Tanaka, one of the managing brewers at Hakkaisan. I asked Tanaka-san to show me how they were made. I had to wait until this summer, but I finally got my chance to see how Umeboshi come to be. I did my best to document the process below.
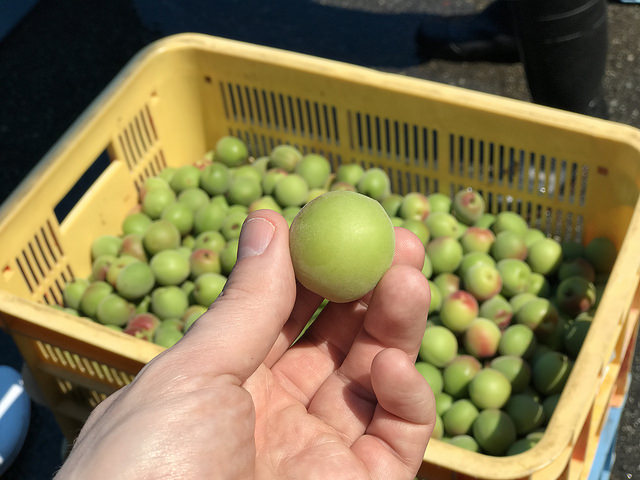
Umeboshi of course must start with good ume. Japanese ume plums are a unique variety available widely in Japan but more rare overseas. They are quite small, about the size of a walnut and are harvested every year from mid to late June. Because of that, summer is umeboshi making season. Its important that the plums be picked when they are still firm and hard and still mostly green in color. Wakayama Prefecture is the most famous ume growing area in Japan.
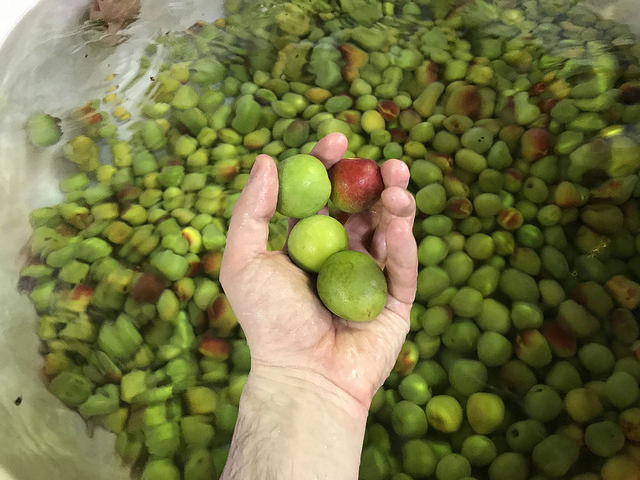
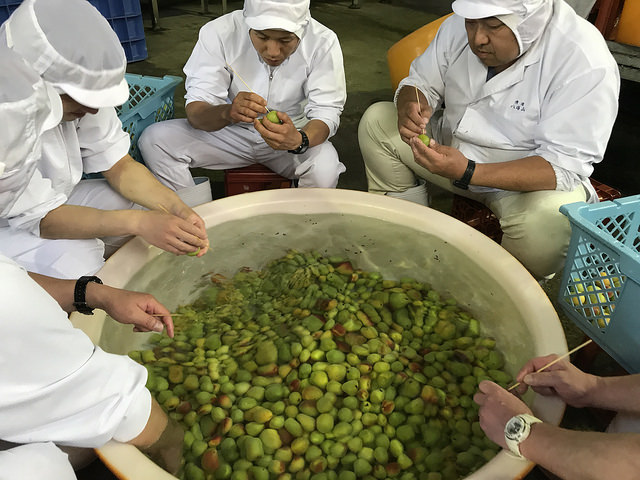
The first step is to wash the ume carefully. Any ume that have bruises or ripped or damaged skin cannot be used to make umeboshi. The skins must be pristine. we carefully washed each ume and then with a small wooden pick, we removed any remaining stems being very careful not to pierce the skin. If there is any blemish on the ume, mold can grow there and ruin your whole batch.
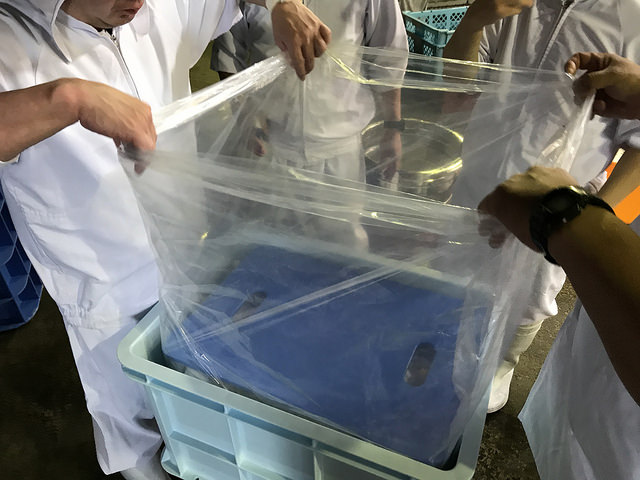
Once the ume are washed, cleaned, stemmed, and carefully checked for bleminshes the next step is to layer them with salt. Here the plums are put into a food safe container with a plastic lining. The salt will do a few things. First, the salt will draw out moisture from the Ume. The salt content will also begin to preserve the ume and lastly, it will also inhibit the growth of any mold. Different Umeboshi recipes call for a different amounts of salt to ume ratio.
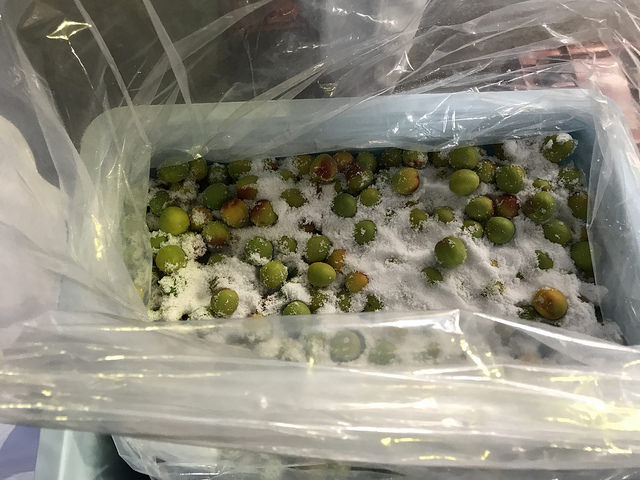
Next the ume and salt mixture is sealed up with a weight on top. The weight is important to apply pressure that will help the salt to draw moisture out of the plums. Once the weight is on top, the container is sealed air tight to avoid contamination.
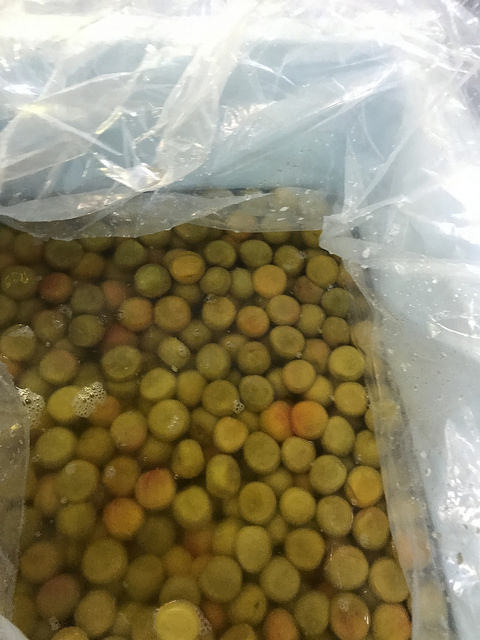
After about 1 week, we carefully reopen the container. Here you can see the umeboshi are still greenish yellow in color, but now floating in liquid drawn out of the plums by the salt.
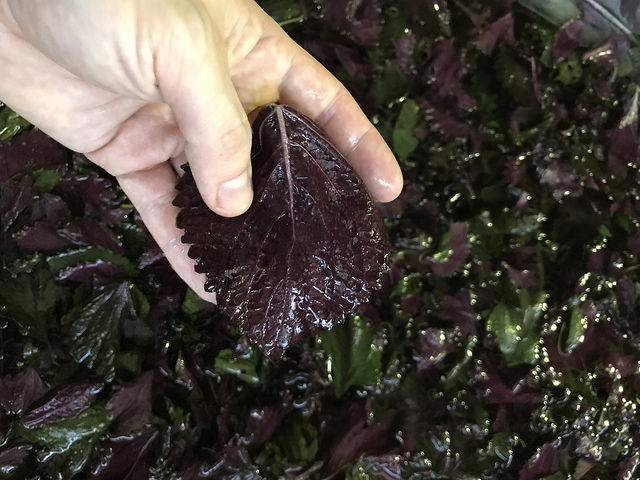
If you’ve eaten umeboshi before, you know they are most often reddish in color. where does this red come from? Well, it comes from our next ingredient: red shiso. You may be familiar with green shisho leaves served along with your sushi or sashimi. Red shiso is a relative of the green variety, but quite different in taste. As such, it is not eaten raw as much. Here is the red shiso as we receive it from the farmer. I have even seen red shiso growing wild out here in the Niigata countryside.
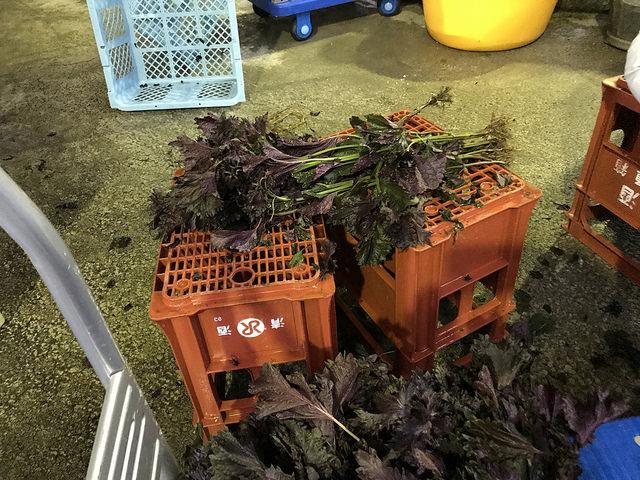
Red Shiso has a two tone leaf with a dark green top and a deep purple underside. To prepare the shiso for use, we must first remove all the leaves from the stems and wash them very thoroughly.
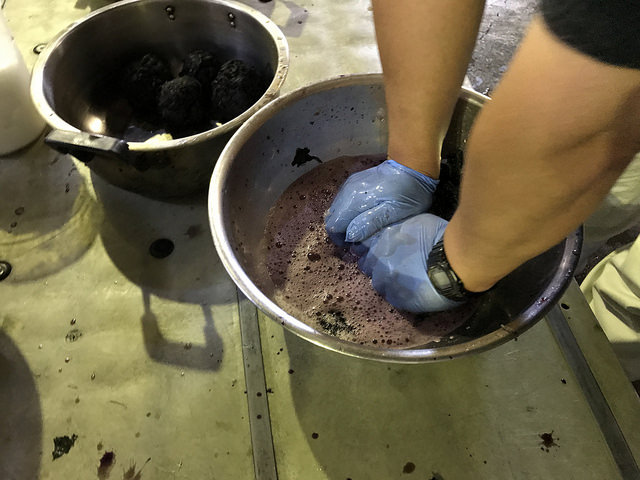
After washing, we process the leaves in big bunches. We mix them with salt and press them between our hands, squeezing as hard as possible. Tenderizes the tough shiso and removes unwanted moisture as well. Slowly, the leaves soften up and get tender. We press them into ball shapes abou the size of a softball.
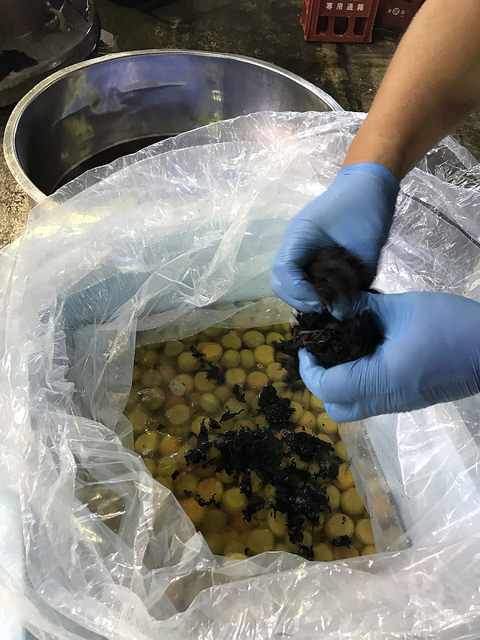
When all the shisho leaves have been washed, salted and pressed, we spread them out in one thick layer on top of all the ume and ume liquid. The weight is set back on top and the container is again re-sealed air tight. These shiso leaves will give off a coloring to the ume and the liquid, turning them from yellow-green to a reddish color.
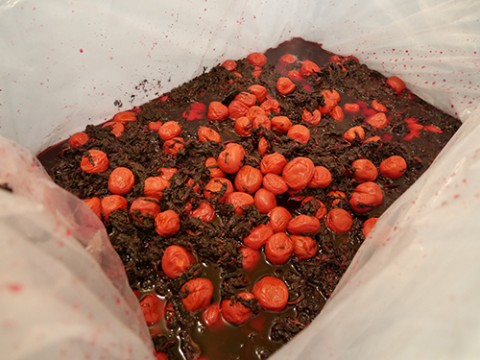
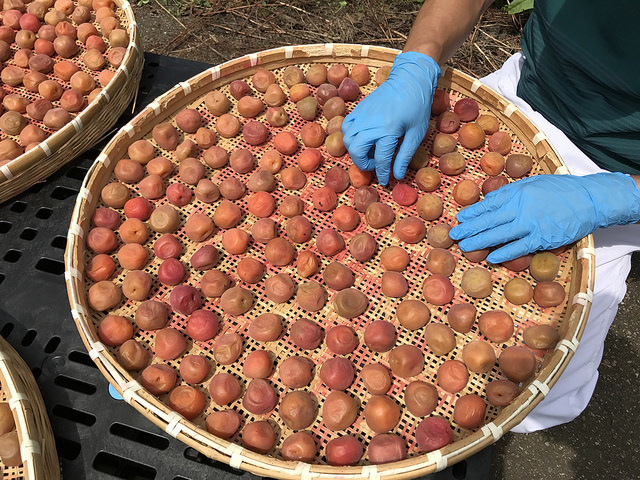
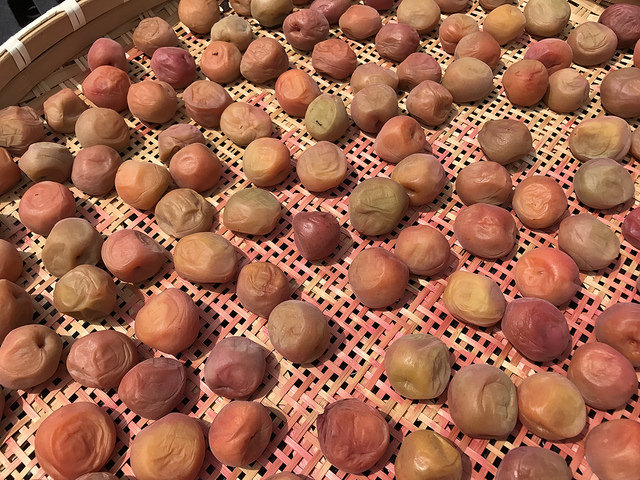
The Shisho and ume stay wrapped up for about one month. We next look to the weather forecast and try to find three days with warm temperatures and no rain. Buy this point it is early august and the rainy season in Japan is more or less over. To start the drying process, we strain all of the plums and strands of shiso from the liquid. The brining liquid is now a dark purple and we reserve this liquid. The ume and shiso are separated and carefully laid out on bamboo baskets to air dry outside in the sun.
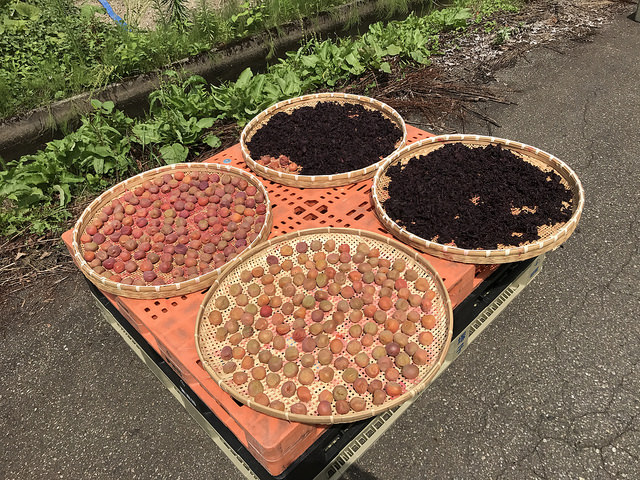
For three days the Ume are dried and turned by hand every few hours. this ensures that the plums dry evenly. Sometimes the ume skin will stick to the basket and rip. if this happens, we put these ume to the side to eat immedately, they cannot be further preserved with torn skin.
After 3 days of drying in the sun, the ume and shiso are returned to the liquid to soften further and turn an even deeper red. From this point on the ume are officially “umeboshi”, but further aging gives them a deeper flavor. As I mentioned above umeboshi are best eaten in small nibbles with white rice. A paste can also be made from Umeboshi and is served alongside everything from chicken skewers to cucumber.
The Umeboshi is a classic japanese food. If you haven’t tried it yet, please do. Homemade is best and don’t be like me… please learn to eat it the right way!